note: Read the second part of this post here.
Introduction
Many companies nowadays are facing the question, “How can I get value from my data easier and faster?”. Whether you already are or will be one of them, this article will show a way to streamline data processing and improve data analytics. A key development in this field is the product “dbt” (data build tool) which provides a uniform and consistent framework for maintaining and building business logic on top of your database.
One of its features is the dbt Semantic Layer which can help create a foundation for better Business Intelligence processes. In the first part of this article, we will explain what a Semantic Layer is. In the second part of this article, we will describe 2 use cases to show how you might integrate dbt SL with the current Business Intelligence landscape:
- Google Sheets (for Business Analysts),
- Python (for Data Engineers and Data Science).
What is dbt?
In addition to other contemporary data modeling tools, there is dbt. In the ETL / ELT processes, dbt stands for the T - transform. This platform allows you to create transformations using SQL, add tests, and generate user-friendly documentation. While it's not designed to replace existing data platforms or modeling languages, it can be integrated into various data processing tools as a logical layer to maintain business logic. Similar to other advanced tools, dbt enables you to save transformed tables in your target database and define the conditions under which the results should be updated.
What is Semantic Layer
The dbt Semantic Layer (SL) is an extension of dbt's main functionality, designed to provide a centralized and consistent way to define business metrics, dimensions, and relationships. It acts as a single source of truth for business logic, ensuring that everyone in the organization uses the same definitions for key metrics. The important point is that dbt SL is a living product with which you can communicate via API to obtain results of specific business calculations.
This layer sits between raw data and business intelligence (BI) tools, facilitating accurate and consistent reporting. The dbt SL is a logical layer created on top of your data model where you can define calculations for metrics and also dimensions by which you want to analyze this data.
Key dbt Semantic Layer Features
- Metric definitions: the SL allows for the definition of metrics in one place, ensuring consistency in calculations across reports and dashboards.
- Dimension management: It provides functionality to define dimensions by which you want to enable data analysis, facilitating better quality of slicing.
- Data lineage: Users can trace the origin of data points back to their source, promoting transparency and trust in the data. This is possible thanks to the automatically generated online project documentation.
- Compatibility with BI Tools: The SL integrates with Google Sheets, MS Excel, and popular BI tools like Tableau, Looker, and Power BI, enhancing their capabilities.
Development environments
There are two available versions of the dbt tool - dbt Cloud and dbt Core. In principle, they both provide the same basic dbt platform, but they differ in their working methods and available functionalities. dbt Core is the open-source, self-hosted version, which requires a full setup of the development environment. To use this version you need to arrange hosting for the platform, configure scheduler and orchestrator for the jobs, and also add the logging and monitoring mechanisms. In comparison, dbt Cloud is a ready-to-work platform managed by dbt, a hosted service that provides a web interface enabling easy development of all transformations, collaboration, and orchestration.
Moreover, costs and features are key differentiators between those two products. dbt Core is free and open source, whereas dbt Cloud offers a free tier with limited options and paid tiers with all features, cost depending on the team size. dbt Core is only limited to basic functionalities, and dbt Cloud offers a complete platform for team collaboration, role-based access control, development environment, and versioning.
Since we are focusing here on dbt thw Semantic Layer, it is Important to mention that on the dbt Core, the user can only create SL definition and validate it locally - using dedicated Python libraries. Whereas on dbt Cloud, assuming that we purchase a Team or Enterprise license, we get an option to configure online API for our dbt SL. Thanks to this API, we can communicate with our model using external tools such as Google Sheets or Python applications.
Usage
You can interact with the SL in various ways, generally categorized into two groups: predefined and custom. Predefined integrations work as plug-ins for selected tools like Google Sheets, Microsoft Excel, or Tableau (see the full list here). In these programs, you can activate the plug-in, establish the connection with SL, and configure queries using a drag-and-drop interface. See the use case below for how to connect dbt SL with Google Sheets.
On the other hand, custom integrations allow software developers to create tailored solutions that integrate the dbt Semantic Layer with existing IT architecture. As of the time of writing, engineers can use the JDBC API, GraphQL API, or Python SDK for these custom integrations (see more details here). See the use case below for how to communicate with dbt SL using GraphQL API.
Considering the capabilities of the dbt Semantic Layer, there are two key areas within your company that could significantly benefit:
Use case: dbt SL with Google Sheets
What is the business context? You are a Business Analyst who relies heavily on data tools such as Microsoft Excel or Google Sheets. In your daily work, you get many requests to check data, calculate some basic KPIs and respond to business questions quickly. You are not a developer thus, you do not know how to code in SQL or Python, and you are looking for ready-to-use data views. Recently, you were informed that your company implemented a dbt tool, and you can consume dbt Semantic Layer with predefined KPI calculations. You want to extend your toolset with this new toy and start setting up a new data flow.
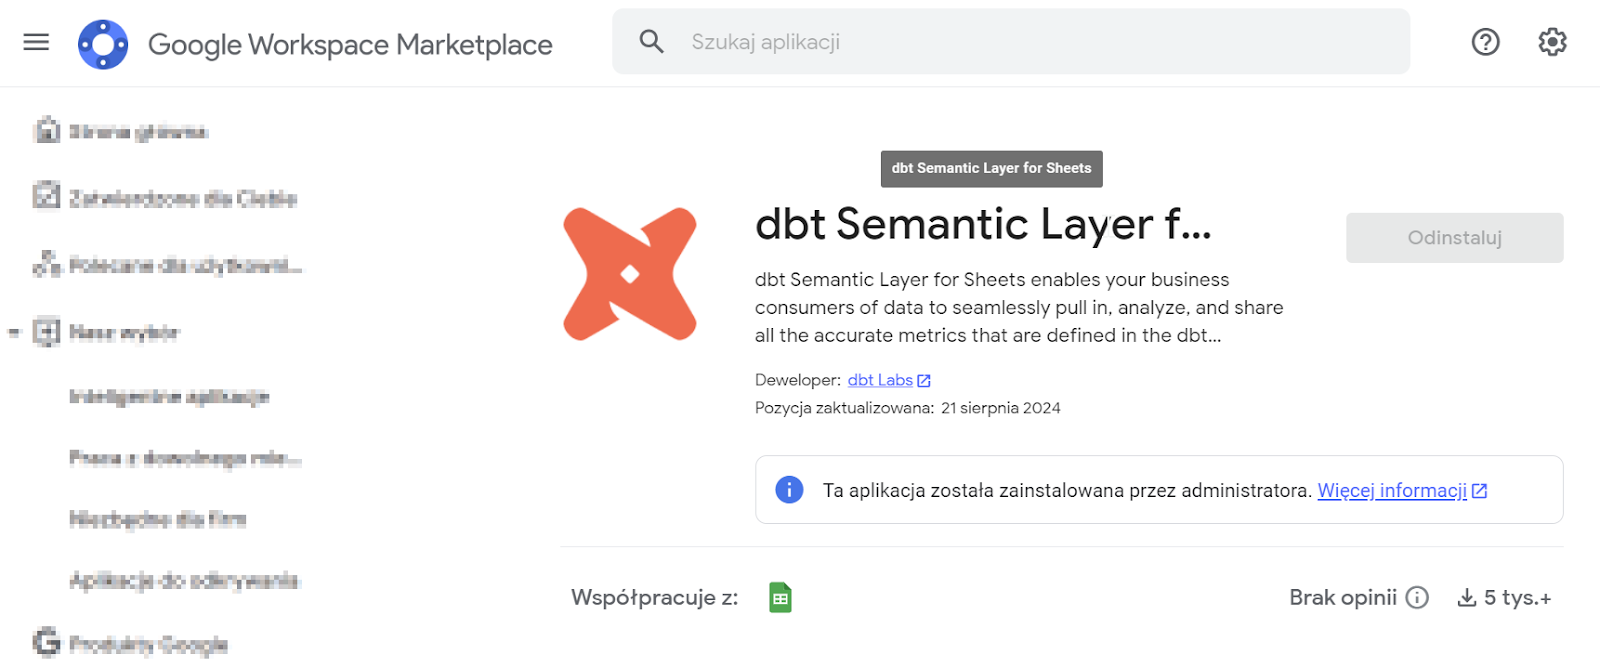
In order to use dbt SL in Google Sheets, you first need to add a new extension named “dbt Semantic Layer for Sheets” from Google Workspace Marketplace. If you cannot add it yourself, then you have to ask your Google Tenant Admin to install it in your organization. When this is done, then open the Google Sheets app and go to Extensions → dbt Semantic Layer for Sheets → Open.


To connect to a specific dbt SL, please provide the host name, environment ID, and service token. All of those can be found in Settings → Project → Semantic Layer (see example on screenshot below).

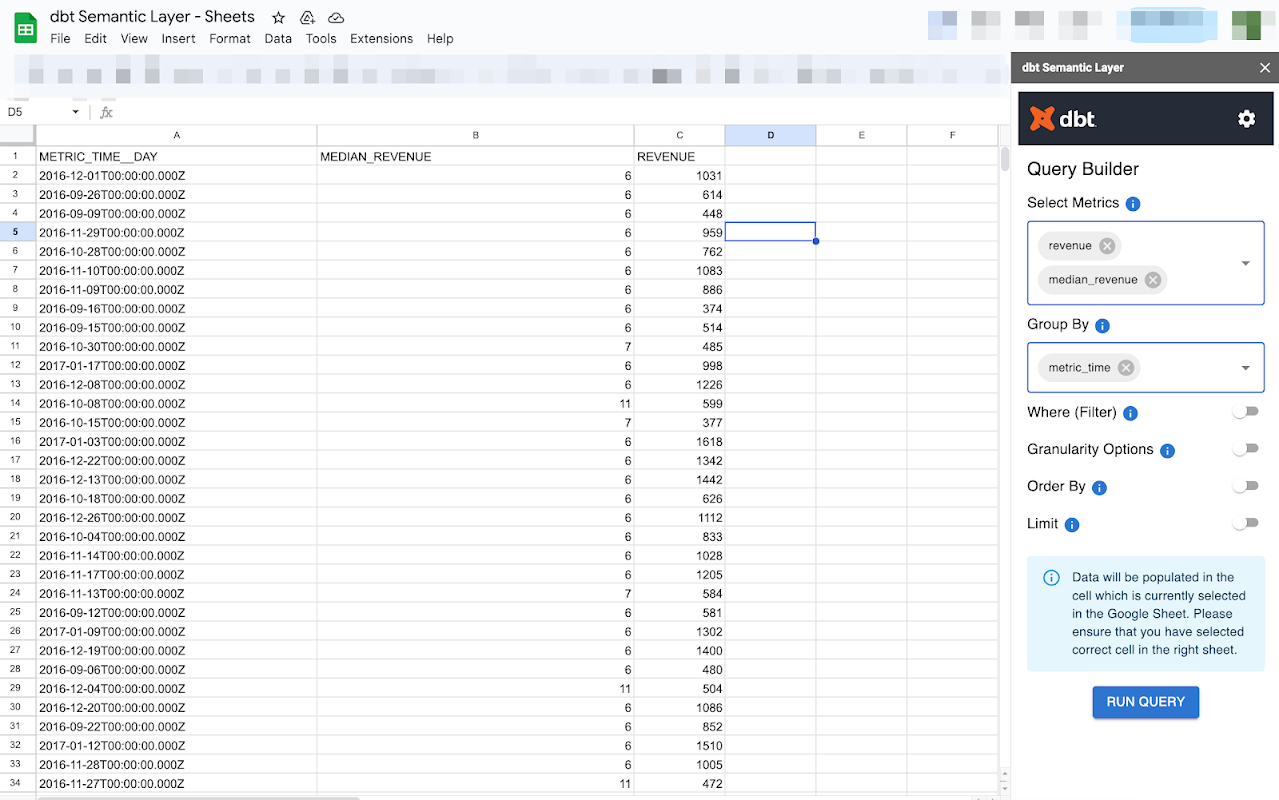
After connection to SL you will see the Query Builder where you can select data you want to see i.e. metric, grouping by, filtering etc. When you are done, click the Run Query button, and Google Sheets will request the data from dbt and present the output in the table.

This query will be refreshed every time you open Google Sheets or you click the Run Query button again. You can use this data in your further analysis or dashboard creation.
Use case: dbt SL with GraphQL API in Postman
The presentation of the solution will be two-fold, first we will show how to build and test the request using Postman, and then how to write code in Python.
First, you need to get the URL under which your project is available. Go to Settings → Accounts → Access URLs and copy the value listed there (ending with ...dbt.com/).

Get the details of your SL by navigating to Settings (icon in the top right corner), select Projects and then the name of the project you work on. Scroll down to the Semantic Layer details. Please write down details of your Semantic Layer.

Open Postman and create a new POST request. Paste the Access URL to the URL section and add ‘/api/graphql’ at the end. Next, select Authorization to be ‘Bearer Token’ and paste the Service Token generated in dbt Cloud. In case you do not have one yet then please go to Settings, select “Service tokens” on the left panel and generate one there.

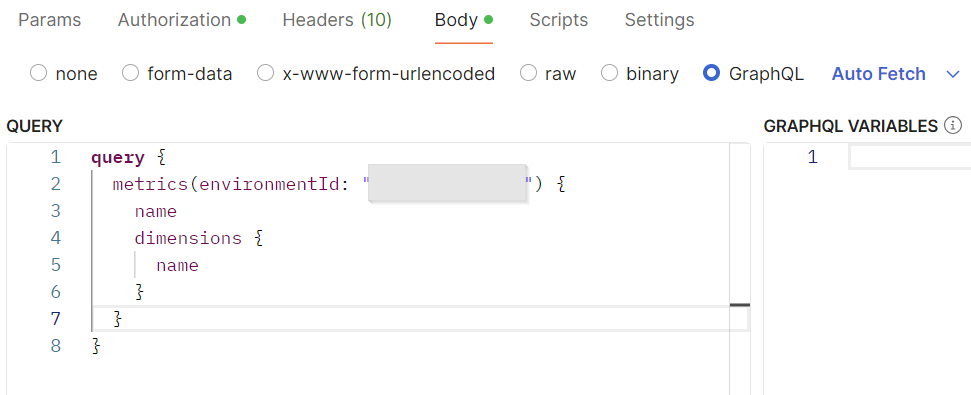
In the Body section define the type to be ‘GraphQL’ and paste the query you want to run in the Query section. Please see the documentation of using GraphQL API here.
As an example, I am requesting from API the list of all available metrics, including the dimensions related to each of them. Documentation of all possible requests is available here.

Send the request and you can see the results in Postman.
{
    "data": {
        "metrics": [
            {
                "name": "revenue",
                "dimensions": [
                    {
                        "name": "metric_time"
                    },
                    {
                        "name": "order_id__order_placed_at"
                    },
                    {
                        "name": "order_id__order_status"
                    }
                ]
            },
            {
                "name": "orders",
                "dimensions": [
                    {
                        "name": "metric_time"
                    },
                    {
                        "name": "order_id__order_placed_at"
                    },
                    {
                        "name": "order_id__order_status"
                    }
                ]
            }
        ]
    }
}
When you create a query that is running successfully then you are good to go and move to Python. Open the ‘Code’ section and copy the query which will be used later.

The general logic when communicating with GraphQL API is that first, you build the query and send it to API, in response, you get the QueryID, and in the second step you send a request to API asking for the results of your QueryID. We prepared a skeleton of the query that you can use in Python - see below.
In Step 1 you send the initial request to get the QueryID, next you have to wait for some time before sending the second request, and finally, you send another request to get the result using the obtained QueryID.
Open the code editor of your choice and copy the code skeleton, adjust the initial_query to contain the query of your choice, replace YOUR_ACCESS_TOKEN with your Service Token, and adjust time.sleep parameter to the complexity of your request. Now your code is ready, you can run it and see the result.
Sample code
import requests
import time

# Define the GraphQL API endpoint
url = "https://your-graphql-api.com/graphql"

# Step 1: Send the initial request to get the QueryID
initial_query = """
query {
  initiateQuery {
    queryId
  }
}
"""

# Set up the request headers (if needed)
headers = {
    "Content-Type": "application/json",
    "Authorization": "Bearer YOUR_ACCESS_TOKEN"  # Optional, if your API requires authentication
}

# Make the initial request to get the QueryID
response = requests.post(url, json={'query': initial_query}, headers=headers)

# Check if the response is successful and extract the QueryID
if response.status_code == 200:
    response_json = response.json()
    if "errors" in response_json:
        print("Errors returned from the API during the first query:")
        print(response_json["errors"])
    else:
        query_id = response_json["data"]["initiateQuery"]["queryId"]
        print(f"QueryID obtained: {query_id}")
else:
    print(f"Initial query failed with status code {response.status_code}")
    print(response.text)
    exit()

# Step 2: Wait for some time before sending the second request
time.sleep(10)  # Adjust the delay as necessary

# Step 3: Send another request to get the result using the obtained QueryID
result_query = """
query getResult($queryId: ID!) {
  queryResult(queryId: $queryId) {
    status
    resultData {
      field1
      field2
      # Add more fields as per the schema
    }
  }
}
"""

# Define the variables for the second query
variables = {
    "queryId": query_id
}

# Make the request to get the result
result_response = requests.post(url, json={'query': result_query, 'variables': variables}, headers=headers)

# Handle the response from the second query
if result_response.status_code == 200:
    result_response_json = result_response.json()
    if "errors" in result_response_json:
        print("Errors returned from the API during the second query:")
        print(result_response_json["errors"])
    else:
        result_data = result_response_json["data"]["queryResult"]
        print("Result Status:", result_data["status"])
        if result_data["status"] == "COMPLETED":
            print("Query Result Data:", result_data["resultData"])
        else:
            print("Query is still processing or failed.")
else:
    print(f"Result query failed with status code {result_response.status_code}")
    print(result_response.text)
Summary
The dbt Semantic Layer, if defined correctly, can bring significant advancement in a company’s data analytics. It provides a unified and consistent framework for defining business metrics and dimensions addressing a critical need for many organizations. As demonstrated in the ‘Usage’ section, the adoption of the dbt SL can extend Business Analysts work by new data sources as well as advance Data Science work on the next level, leading to substantial improvements in data consistency and overall efficiency.
For organizations striving to enhance their data analytics capabilities, investing in a dbt Semantic Layer is a strategic move that promises significant long-term benefits. As the data landscape continues to evolve, tools like dbt will play an increasingly vital role in shaping the future of business intelligence and analytics.
If you want to know more about dbt capabilities or you are facing other data na AI related challenges, do not hesitate to contact us or book a free consultation.